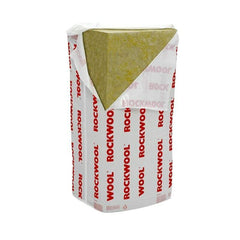
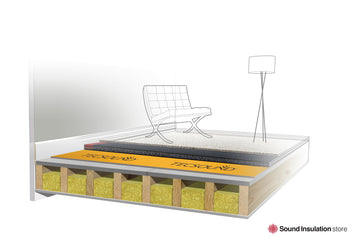
Uplift the existing floorboard / chipboard floor to expose the joists and cavity. Clear the cavity and install 100mm RWA45 Rockwool into the cavity at the bottom leaving an airgap at the top of the cavity. Friction fit the insulation tight within the cavity and infill any small gaps with insulation.
Ensure your joists are level. You can pack out the top of the joists to level them or in extreme cases strap new timbers to the existing joists to level them. Install STS Board 22mm over the joists. Install in a brick bond pattern. The STS board can be cut with a circular saw or festool with appropriate extraction. use the STS adhesive within the tongue and groove joints and the STS screws to fix down the boards to the joists. Leave a 5mm expansion gap around the perimeter of the room where the boards meet the wall and infill with an acoustic sealant.
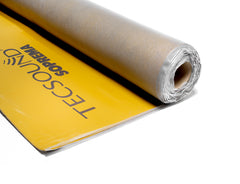
Once the STS board is installed created a sound solid subfloor next install the Tecsound 100. Roll out the Tecsound and but joint the rolls, install tightly to the walls. If required the Tecsound can be glued down using the self adhesive version or approved adhesive such a Mapei Elastorapid vs90. Install the adhesive using a 3mm notched trowel. Again use an acoustic sealant around the perimeter of the Tecsound. Tecsound is easily cut with a straight edge and a stanley knife.
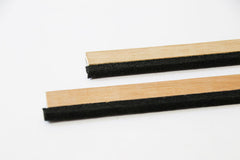
Over the Tecsound around the perimeter of the room install the Acoustilay perimeter strips. Push the expanding foam side of the strip tight to wall so it compresses. Screw the strip in place through the Tecsound into the subfloor. Do this around the entire perimeter of the room. This strip will then receive your gripper rod, the height of the gripper rod will match perfectly with the heigh of the dB Acoustic Underlay once installed.
Install you dB Acoustic Underlay tightly up to the perimeter strips. Install in a brick bond pattern. Cut the matting using a straight edge and a stanley knife, scoring the matting repeatedly to get a clean cut. Bond down the matting using Mapei Elastrapid VS90. Use a 3mm notched trowel to apply the adhesive. Your carpet can now be installed over the matting onto the flush gripper rods.
.
Important Information
Sound Insulation Store are specialists in acoustics and sound insulation. All guidance, system information and predicted performance figures are provided for general assistance only.
It is the customer’s responsibility to ensure that the existing structure is suitable and compatible with any proposed sound insulation system. Where required, customers must seek advice from a structural engineer, building control, or another appropriately qualified professional.
Customers must also confirm whether their project requires specific fire resistance, structural, or regulatory compliance measures. Any fire, structural, or regulatory approval must be obtained independently from a competent specialist.
Sound Insulation Store has worked with NCPL to produce Insul prediction graphs and holds site test data on our Part E systems. These figures are intended as guidance only.
Actual on-site performance will vary depending on the condition and construction of the existing building, flanking transmission routes,installation quality, and any unforeseen site variables.
No performance level can be guaranteed unless independently tested on site after installation.