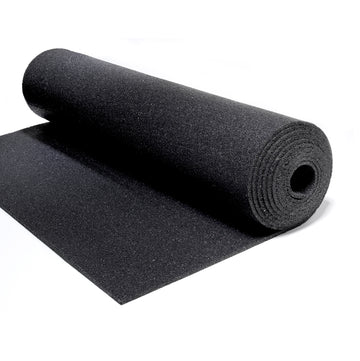
DB FFR 5MM Acoustic Underscreed (10M2)
Secure payments
Product Information

DB FFR Rubber Underlay is a recycled designed to absorb footfall noise (Impact) It can be used in residential or commercial applications. Flooring finishes include;
Engineered timber, Laminate, Stone flooring & Carpet
Introducing the dB FFR 5MM 10M2 ROLL, the perfect solution for sound reduction in new build construction. Our dB FFR material, used with our dB RD Flanking strip and poured screed, offers a cost-effective alternative to Robust Details for developers of apartments.
Check out our underscreed case study for sound advice.
TECHNICAL SPECIFICATION - 1M X 10M (10 M2 ROLL)
Thickness 5MM
Roll dimension (W x L) 1m x 10m
Roll Weight Kg 43
Elongation Break .% 18 - 29
Tear Strength Kn/m 3.1 - 3.6
Shore A Hardness Shore A 56
Slip Resistance Wet pendulum Class X
Slip Resistance dry pendulum Class F
Temperature ˚C -25 to 10
Installation Guidance:
Step 1: Create an optimal surface - Clean the floor substrate to remove any dust, debris, or particles.
Smooth out any bumps or irregularities that may hamper the installation process.
Step 2: Acclimatization: Fully unroll each roll and leave it in the designated area for at least 6hours, preferably overnight. Failure to acclimate may result in shrinking after installation
Step 3: Perimeter Isolation Strips - Start in a corner of the room. Attach the perimeter isolation strip along the base of the wall and secure it with tape.
Step 4: Laying FFR - Start laying FFR in one section of the room, ensuring it butts up to one edge of the perimeter flanking band. Unroll the underlay and cut any excess material to fit the desired room measurements.
SCREED JOINS
I] Sand and cement screed - Ensure adjacent portions of FFR overlap each other by up to 100 mm. Secure the sections together with adhesive tape. Proceed with post - installation steps.
II] Liquid or proprietary screed - After unrolling subsequent portions of FFR, butt up and tape over the joints. Proceed with post - installation steps.
INSTALLATION
A] Floating or Loosely laid
Lay FFR underlays onto the subfloor. Use 3” wide duct tape to firmly secure joints. Proceed with post - installation steps.
B] Glue Down
1) Roll out the first sheet of underlayment halfway lengthwise.
2) Apply F3 adhesive evenly perpendicular to the seam using the appropriate notch trowel, following the guidelines provided in the F3 product specification guides.
3) Carefully lay the underlayment on the adhesive, and apply adhesive under the second half.
4) Roll over the second half of the first sheet and the first half of the second sheet, continuing this process for each consecutive sheet
5)Immediately after laying each sheet, roll the material with a medium-weight roller of at least 50 lbs to ensure proper adhesion.
6) Leave the installed underlayment undisturbed for at least 12-24 hours after rolling is completed.
7) Protect the installed underlay from foot traffic for a minimum of 24 hours to allow the adhesive to fully cure. Proceed with post - installation steps
POST - INSTALLATION
Step 1: Polyethylene Sheet - Lay a polyethylene sheet over the FFR rolls to prevent water seepage. Skip this step if installing a finished floor directly.
Step 2: Finished Floor or Screed - Proceed to pour the screed or lay the finished floor directly on top of the FFR underlay, depending on the project requirements.


